Ganglinienfenster/en: Unterschied zwischen den Versionen
Ferrao (Diskussion | Beiträge) (Die Seite wurde neu angelegt: „===Create annual cycle===“) |
Keine Bearbeitungszusammenfassung |
||
| (80 dazwischenliegende Versionen von 4 Benutzern werden nicht angezeigt) | |||
| Zeile 1: | Zeile 1: | ||
<languages/> | <languages/> | ||
<div style="text-align:center; margin-bottom:1em;"> | |||
<evlplayer alignment="center" width="640" service="youtube" defaultid="nk2_LRwv0cA" id="player"></evlplayer> | |||
{{#evl:nk2_LRwv0cA|Creating and editing annual patterns|1|player=player}} | |||
{{#evl:qZwS-34Zqfc|Weekly patterns|2|player=player}} | |||
{{#evl:c78yhMe-Yxc|Daily patterns|3|player=player}} | |||
</div> | |||
[[ | Patterns and their corresponding hydrographs are linked with scenarios. Therefore, they are either created individually for each scenario or are transferred from another scenario. | ||
To create and edit patterns, follow ''Menu bar → System → Yearly pattern / Weekly pattern / Daily pattern''. After editing the underlying data and creating the corresponding hydrographs, the information is stored in the [[Special:MyLanguage/Datenbankstruktur#Gebietsdatenbank|database]]. | |||
[[Datei:Ganglinie001_EN.png|Datei:Ganglinie001_EN.png]] | |||
The menu item ''View'' updates the patterns and their corresponding hydrographs, or sorts them alphabetically. Using the menu item ''Time series pattern'', new patterns are created, edited, or deleted. This is also possible via the function bar [[Datei:Ganglinie003.png|Datei:Ganglinie003.png]]. | |||
[[Datei:Ganglinie002_EN.png|Datei:Ganglinie002_EN.png]] | |||
===Creating Annual Patterns=== | |||
: | To create a new annual pattern and a corresponding hydrograph, click on the icon [[Datei:Ganglinie013.png|Datei:Ganglinie013.png]]. This opens a window with the following question: ''Would you like to create a flexible annual pattern?'' | ||
[[Datei:Ganglinie004_EN.png|Datei:Ganglinie004_EN.png]] | |||
Confirmation with '''Ja''': | |||
: a <u>flexible</u> period can be specified for the annual pattern. The following window opens: | |||
: [[Datei:Ganglinie005_EN.png|Datei:Ganglinie005_EN.png]] | |||
: | |||
In the panel ''Name'', the name of the pattern and the corresponding hydrograph is defined. Then, there are two options for the creation of a new pattern. | |||
#'''Individual Creation of a Pattern''' <br /> Double-click the first line to edit the displayed date and value. Afterward, double-clicking the second line selects it for edits. Clicking the ''Edit'' button allows entering flexible times with their corresponding values. Confirming the values with ''OK'' inserts the values in the chart, and the next line is selected automatically for editing. Times can be particularized in the desired resolution. Clicking the ''Cancel'' button, all previously edited entries are saved and the editing mode is terminated. <br /> [[Datei:Ganglinie006_EN.png|Datei:Ganglinie006_EN.png]] <br /> Lines can be removed by clicking the button ''Delete''. The mean value is calculated automatically from the entered values. If the interpolation mode is active, the values are interpolated between two dates. If the interpolation mode is not active, the value for a date is assumed constant until the next certain date.<br /> The following figure shows an exemplary result for an annual pattern: <br />[[Datei:Ganglinie007_EN.png|Datei:Ganglinie007_EN.png]] | |||
#'''Transferring Data from Existing Patterns'''<br /> If yearly, weekly, or daily patterns and their hydrographs already exist in other scenarios, they can be transferred by clicking on the symbol [[Datei:Ganglinie014.png|Datei:Ganglinie014.png]]. An overview of all projects and scenarios opens. Now, click on the desired scenario and select the desired pattern. By clicking the ''Apply'' button, the data is transferred. <br /> | |||
[[Datei:Ganglinie008_EN.png|Datei:Ganglinie008_EN.png]] [[Datei:Ganglinie009_EN.png|Datei:Ganglinie009_EN.png]] | |||
Confirmation with '''Nein''': | |||
: a <u>constant</u> pattern is created and for each month, a value must be specified. Again, the pattern can be edited individually or transferred from another scenario. You can choose between active and inactive interpolation mode. The input of the values is conducted by clicking on the corresponding line and entering values. | |||
: [[Datei:Ganglinie010_EN.png|Datei:Ganglinie010_EN.png]] | |||
After the flexible or constant annual pattern and the corresponding hydrograph have been created, the information is saved with the '''Save''' button. By clicking the '''Cancel''' button, no saving takes place. | |||
=== | ===Creating Weekly Patterns=== | ||
When creating daily patterns and their corresponding hydrographs, a window opens, containing a time step for each day. You can edit the pattern yourself or transfer data from another scenario (see [[Special:MyLanguage/Ganglinienfenster#Jahresgang erstellen|annual pattern]]). You can also choose between active and inactive interpolation mode. The values are entered by clicking on the corresponding line. After the hydrograph for the weekly pattern has been created, the graph is saved with the ''Save'' button. With the ''Cancel'' button, no saving takes place. | |||
: [[Datei: | : [[Datei:Ganglinie011_EN.png|Datei:Ganglinie011_EN.png]] | ||
===Creating Daily Patterns=== | |||
When creating daily patterns and their corresponding hydrographs, a window opens, containing a time step for each hour. You can edit the pattern yourself or transfer data from another scenario (see [[Special:MyLanguage/Ganglinienfenster#Jahresgang erstellen|annual pattern]]). You can also choose between active and inactive interpolation mode. The values are entered by clicking on the corresponding line. After the hydrograph for the daily pattern has been created, the graph is saved with the ''Save'' button. With the ''Cancel'' button, no saving takes place. | |||
: [[Datei:Ganglinie012_EN.png|Datei:Ganglinie012_EN.png]] | |||
Aktuelle Version vom 25. Februar 2021, 08:46 Uhr
<evlplayer alignment="center" width="640" service="youtube" defaultid="nk2_LRwv0cA" id="player"></evlplayer> {{#evl:nk2_LRwv0cA|Creating and editing annual patterns|1|player=player}} {{#evl:qZwS-34Zqfc|Weekly patterns|2|player=player}} {{#evl:c78yhMe-Yxc|Daily patterns|3|player=player}}
Patterns and their corresponding hydrographs are linked with scenarios. Therefore, they are either created individually for each scenario or are transferred from another scenario.
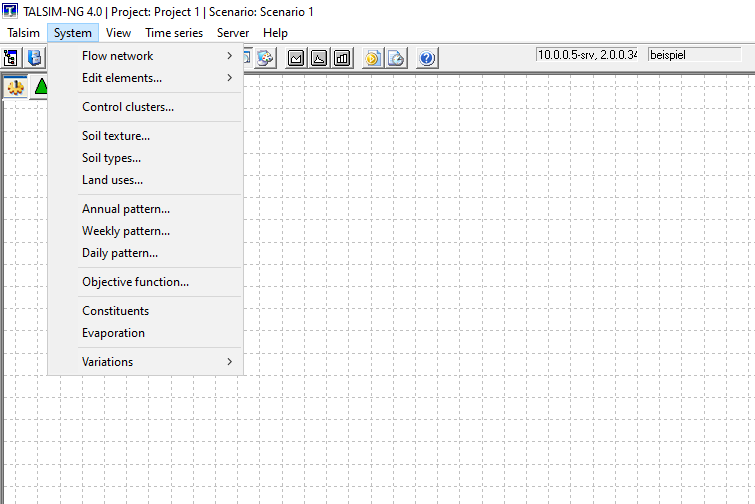
To create and edit patterns, follow Menu bar → System → Yearly pattern / Weekly pattern / Daily pattern. After editing the underlying data and creating the corresponding hydrographs, the information is stored in the database.
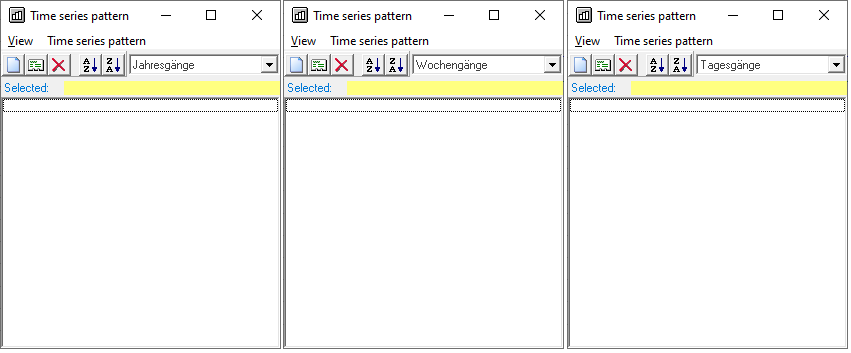
The menu item View updates the patterns and their corresponding hydrographs, or sorts them alphabetically. Using the menu item Time series pattern, new patterns are created, edited, or deleted. This is also possible via the function bar ![]() .
.
Creating Annual Patterns
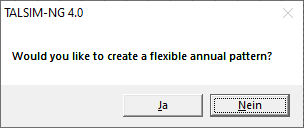
To create a new annual pattern and a corresponding hydrograph, click on the icon ![]() . This opens a window with the following question: Would you like to create a flexible annual pattern?
. This opens a window with the following question: Would you like to create a flexible annual pattern?
Confirmation with Ja:
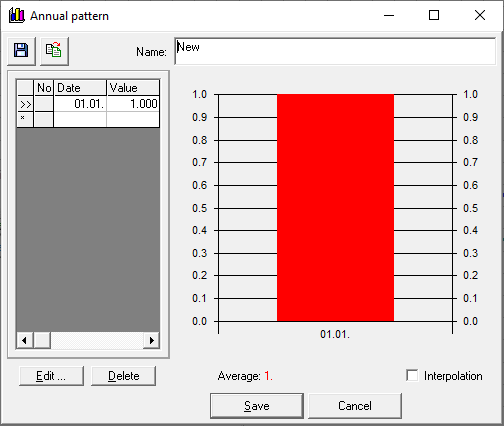
- a flexible period can be specified for the annual pattern. The following window opens:
In the panel Name, the name of the pattern and the corresponding hydrograph is defined. Then, there are two options for the creation of a new pattern.
- Individual Creation of a Pattern
Double-click the first line to edit the displayed date and value. Afterward, double-clicking the second line selects it for edits. Clicking the Edit button allows entering flexible times with their corresponding values. Confirming the values with OK inserts the values in the chart, and the next line is selected automatically for editing. Times can be particularized in the desired resolution. Clicking the Cancel button, all previously edited entries are saved and the editing mode is terminated.
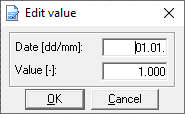
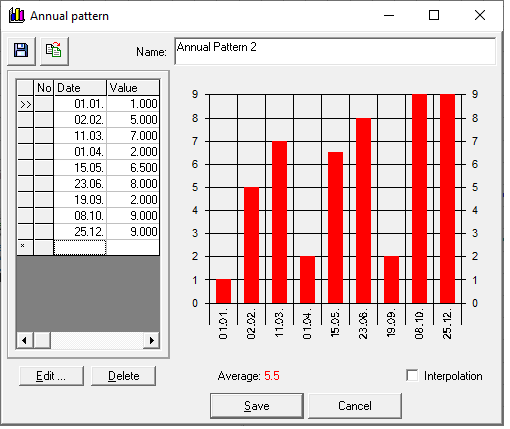
Lines can be removed by clicking the button Delete. The mean value is calculated automatically from the entered values. If the interpolation mode is active, the values are interpolated between two dates. If the interpolation mode is not active, the value for a date is assumed constant until the next certain date.
The following figure shows an exemplary result for an annual pattern: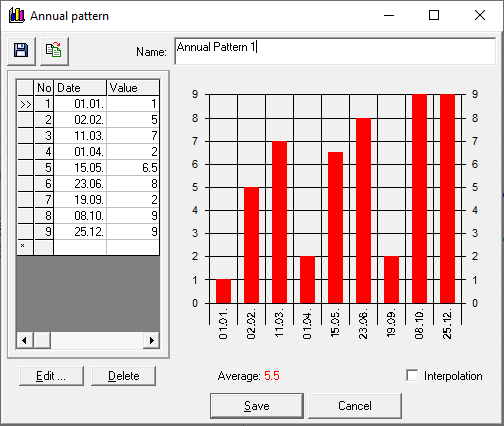
- Transferring Data from Existing Patterns
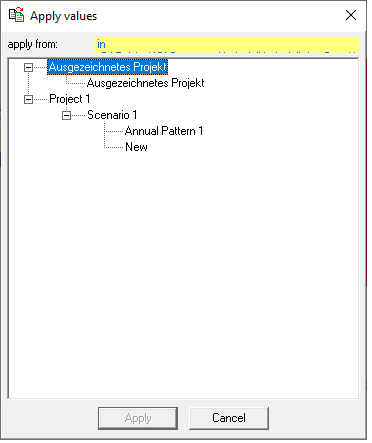
If yearly, weekly, or daily patterns and their hydrographs already exist in other scenarios, they can be transferred by clicking on the symbol . An overview of all projects and scenarios opens. Now, click on the desired scenario and select the desired pattern. By clicking the Apply button, the data is transferred.
Confirmation with Nein:
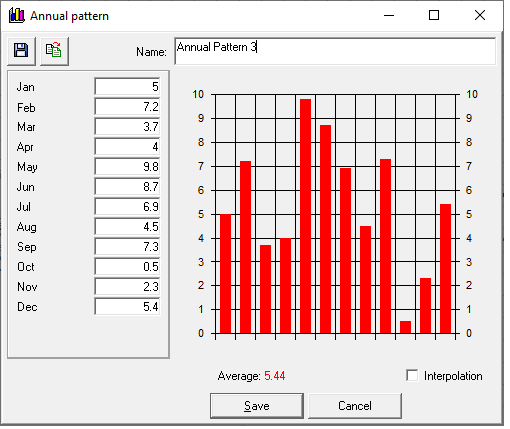
- a constant pattern is created and for each month, a value must be specified. Again, the pattern can be edited individually or transferred from another scenario. You can choose between active and inactive interpolation mode. The input of the values is conducted by clicking on the corresponding line and entering values.
After the flexible or constant annual pattern and the corresponding hydrograph have been created, the information is saved with the Save button. By clicking the Cancel button, no saving takes place.
Creating Weekly Patterns
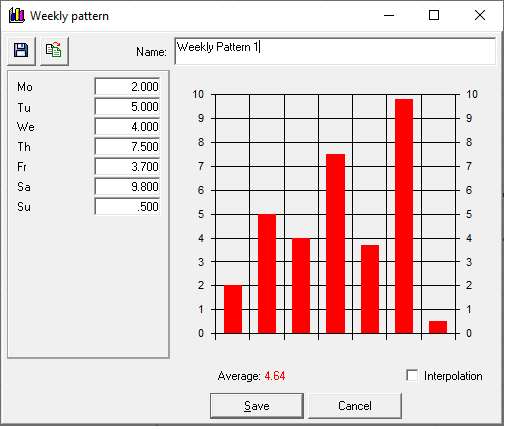
When creating daily patterns and their corresponding hydrographs, a window opens, containing a time step for each day. You can edit the pattern yourself or transfer data from another scenario (see annual pattern). You can also choose between active and inactive interpolation mode. The values are entered by clicking on the corresponding line. After the hydrograph for the weekly pattern has been created, the graph is saved with the Save button. With the Cancel button, no saving takes place.
Creating Daily Patterns
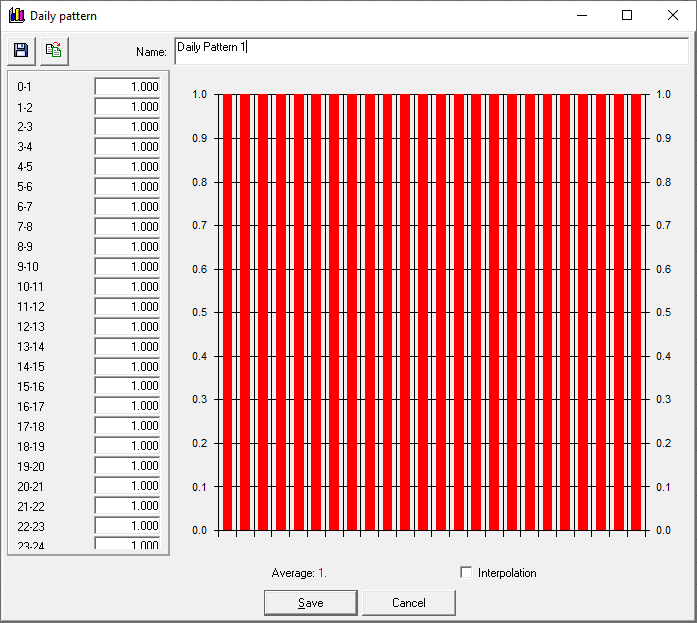
When creating daily patterns and their corresponding hydrographs, a window opens, containing a time step for each hour. You can edit the pattern yourself or transfer data from another scenario (see annual pattern). You can also choose between active and inactive interpolation mode. The values are entered by clicking on the corresponding line. After the hydrograph for the daily pattern has been created, the graph is saved with the Save button. With the Cancel button, no saving takes place.
